Friday, November 15, 2013

Designer Crafts Connection Blog Hop

Welcome to the hop!  This week the Designers are participating in a manufacturers challenge with Smoothfoam and the Robin's Nest and are creating ornaments!  The Holidays will soon be here, hop around and get some great inspiration for family heirlooms and hand made gifts.

This is my creation:


Supplies:
Smoothfoam 3" ball
gold metallic Dew Drops, Robin's Nest
Blueberry acrylic paint, ECO Green Crafts
Low Odor Clear Finish; Krylon
Glitter Blue Ice Stickles, Ranger
Heavy Duty gold tone beading wire
Decorative Tassel, Greenbrier International
Hot Glue Gun
Wire Cutters/twister tool
3/4" Gold metallic wired fabric ribbon, Wrights
piercing tool, paint brush

Instructions:

1. Pierce a hold directly up through the center of the Smoothfoam ball.  This took some work with a piercing tool and a narrow wooden handled paint brush.
2. Cut 8" of heavy duty wire. Insert the wire up through the hole.  Spiral the bottom of the wire and pull it up inside the hole to create a little loop to tie the tassel on later.  Loop the top end and wrap it around itself, pull the loose end to tighten so it will sit firmly to the Smoothfoam.

3. Paint the Smoothfoam ball with acrylic paint.  Use two coats.
4. Hot glue the Dew Drops, evenly spaced onto the painted ball.  Do this by starting with one Dew Drop directly in the center of one side, then put the next one exactly 180 degrees on the opposite side.  Then place a Dew Drop in the exact center of those, and then one more between each, in the center.  That will be your center row and you'll find easy placement for the other two rows about 1" above and below the center row, but centered between the two above or below it.  (This sounds confusing until you're doing it, LOL.  If you read it slow and one step at a time, it makes sense).
5. Apply the Stickles as shown to create a diamond pattern.
6. Attach the tassel to the wire loop you created on the bottom of the ornament.
7. Using about 7" of wired gold fabric ribbon, create a small bow, trim the ends and hot glue to the top of the ornament at the base of the hanging loop.

Thanks for hopping! Click this image to go to the next one.

http://chatteringrobins.blogspot.com/


Tuesday, September 17, 2013

Thursday, March 21, 2013

Altered Arts Magazine: Spring Vase

Welcome to my Altered Arts Magazine Design Team Post.

Sometimes, you need a quick solution.  How about this quick and crafty flower vase for your spring clippings?  Turn an empty spaghetti sauce jar into a lovely container.

SUPPLIES:
Empty large jar (7" tall x 5" diameter)
Scrapbook paper, Stained Stripes, Willard Collection-Fancy Pants
Fairy image and floral border, Winged Things Collection-Mailbox Muse
Green Flourish Bling, Zva Creative
Adhesive

Directions:
1. Cut scrapbook paper to fit around the jar, and tall enough to cover any writing or depressions in the glass.
2. Cut out and glue the border to the top of the scrapbook paper.
3. Cut out and glue the fairy image to the front center.
4. Embellish with bling!

HAPPY SPRING!

Be sure to check out the Altered Arts Magazine site and follow them on FaceBook for more crafty projects.

Make art every day!
Becky
Altered Arts magazine - Hudson, OH

Saturday, March 9, 2013

Designer Crafts: BUTTONS GALORE Challenge & Give Away

Welcome to the March Designer Crafts Connection Manufacturer Challenge and Give Away!  This month, it's all about the buttons, with Buttons Galore & More.   This month, we have many talented Designers sharing projects made with buttons and a fabulous prize package. The give away starts today and ends on March 17th.  Leave a comment to enter.  There will be a prize for one participating Designer and one Reader who comments.  Drawings are random, so leave comments on all the blogs for more chances to win!


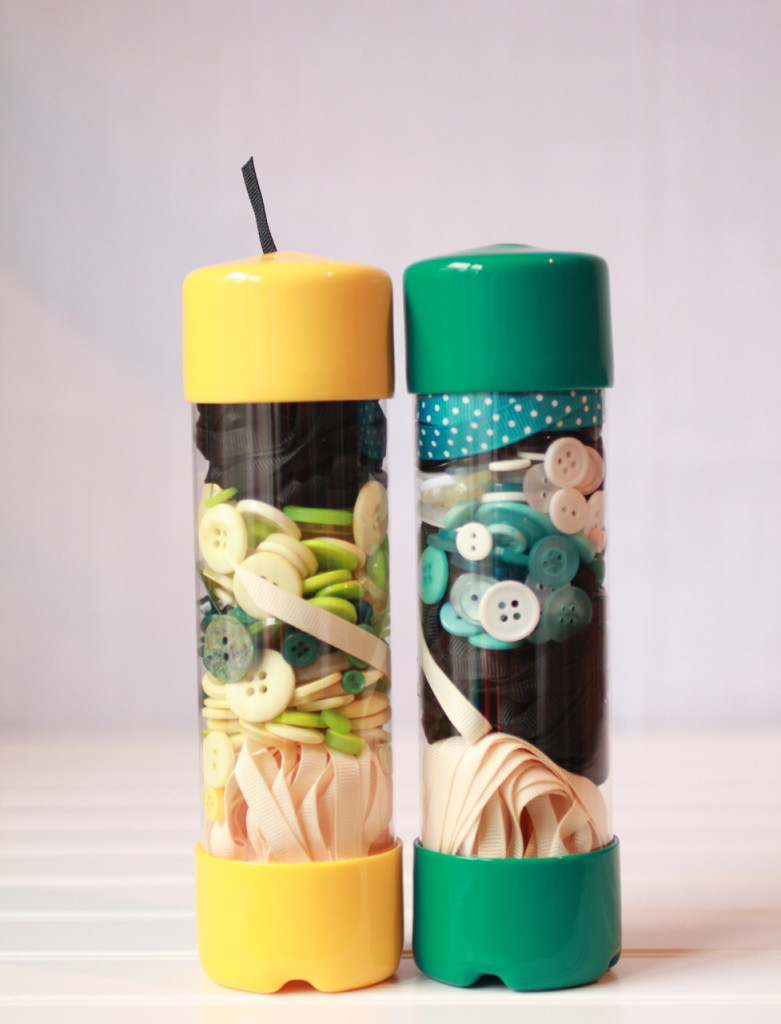
buttons galore craft ideas blog hop viewtainer


I had this BLAHzey black crocheted back that needed some perking up, but I wanted it to be a little quirky and still classy, a perfect fit for those Buttons Galore & More! 


I had plans of adding stems with green rick rack, but after I completed one, it just ruined the "classy" so I removed it.  This is an easy way to add a pop of color and whimsy to something just a bit too boring.

SUPPLIES:  Fabric flowers, 3 lime green buttons by Buttons Galore & More, Black embroidery thread, 8 ply cotton, large hole needle, and your drab garment or bag.

Directions:
1. Use all 8 plies of the thread.
2. Remove the center of fabric flowers, use two layers of flowers behind each button.
3. Sew the button and flowers to the garment using a cris-cross only once, tie off on the inside of the bag.
4. Be mindful of placement and adjust as necessary when sewing.

Use the DCC hop button on my side bar to see many more fabulous button projects!
If you have the time, stop by and see the Buttons Galore & More NEW RELEASES
Follow them on FaceBook for projects and give aways!

Viewtainer has donated the containers for the contest winners

VIEWTAINER containers have clear walls, come in fun bright colors with an easy dispensing cap and NO spilling! Proudly made in the USA!
Company Overview

General Information
For more information contact us at:
Email: contactus@viewtainer.com
Phone: 1/888-865-9935
Website: www.viewtainer.com
Blog: http://viewtainer.typepad.com/blog/

Facebook: http://www.facebook.com/Viewtainer
Twitter: @Viewtainer


Wednesday, March 6, 2013

Altered Arts Magazine: Quick Pendant

 Welcome!  This is my first post to share for the Altered Arts Magazine Design Team this month. I'm excited to be back online and apologize for my absence.  I had an injury on Jan 28th and I am still recovering; nicely but slowly.

This cute pendant was created with a glass bottle stopper from an oil and reed diffuser.


Supplies:
Glass bottle stopper
12 gauge copper wire
glass beads
leather cord with closures
wire cutters and needle nose pliers.  

Here is a close-up of the beads I used, they heart tear drop or almost heart shaped with little wire loops.


DIRECTIONS:
1. Clean the glass stopper thoroughly of any oil from the diffuser to make it safe to handle.
2. Cut a 6" piece of wire and string beads on to it.
3. Wrap the beaded wire around the first indent in the neck of the stopper and twist tightly with needle nose pliers.  Trim the twist to about 1/4" then fold over in the back.
4. Wrap the copper wire along the top of the neck of the stopper until it looks solid.  (about 9 inches)
5. Use the wire to create a loop in the back, twist and secure.
6. Attach the leather cord with closures.

P.S. The kittens are a bit stir crazy from winter and have missed being in the studio too. As soon as I got upstairs, they were franticly chasing the wire I was trying to twist and that lovely box of beads is scattered all over the floor.  oh well!  It's good to be back!

Be sure to follow the Altered Arts Magazine page on Facebook for many altered art projects from the entire Design Team!

Craft on!
Becky