Saturday, December 31, 2011

Duetica.com "Joy" Scrapbook Layout


Wrapping up a joyful season with some Duetica.com Lettering Art Studio!


These cutsie pics are of my Grand Daughter, Ryan. She's 4 years old. I took her to the Elks Children's Christmas Party a couple weeks ago and she was baking cookies at her Daddy's house too!

LARGE FONT: Duetica.com DT Woodwynds-F00 (size 325)

I printed the large JOY directly to the background paper, then used a cutting knife (Thank you Westcott!) to cut slits around the font to slide the printed photos behind the lettering.


I recycled one of the napkin rings from my Holiday table scape blog post to use as a page embellishment: Cricut "Joys of the Season" cartridge, layers of red and green card stock 5", 4.5" and 4", with glitter details and coloring on the leaves.

JOY is accented with small holly punchies and stickles glitter glue holly berries.

"Ryan" and "2011" are Cricut "Plantin Schoolbook" bold text at 3/4" cut from red card stock.


Thank you for stopping by BC Designs Blog. Please visit the Duetica.com Project Gallery and BLOG for lots of lettering inspiration and project ideas.

WISHING YOU AND YOURS A WONDERFUL HOLIDAY SEASON AND A BLESSED NEW YEAR!

Becky

Thursday, December 29, 2011

Duetica.com with ScraPerfect: Scrapbooking


This is a simply beautiful "hybrid" scrapbook page layout. It's also a very inexpensive and easy project. All you'll need is your PC & printer, Duetica Lettering Art Studio, white card stock or photo paper, some Best Glue Ever! a Perfect Crafting Pouch and art glitter!

(click for larger images)


1. Create a document in a word processing program, select the "Draw" document vs. the text document. Alter the page to 12x12 document with .25" borders.

2. Insert a "text" block within the Draw Function to type background. I have repeated my grand daughter's full name in 10 different fonts, making 5 lines that I copied and repeated. She loves pink and purple :o)

3. Create a new "text" block and type an initial. Be sure to "arrange" this block to be on top of the background block.

DUETICA.COM FONTS USED (in order as they appear on the document)
Floot-A00, Mandolyn-B00, Piper-F00, Saxi-E40, Mandolyn-D00, Floot-D30, Piper-B00, Tin Whistle-L00, Woodwynds-I00 and Saxi-G60

4. Insert photos into the document and size accordingly. I "arranged" the layers so the photo was on top of the background fonts, but behind the large initial.

5. At this point I realized I wanted some texture and shading to the background but if I wanted to photos to print well, I'd have to print on WHITE card stock or photo paper.............


6. Under "format", select "area" and pick a texture and colors that work.
You may have to name your new creation and save it. To apply it to your page, see below.


7. Under Page Set up for your document, select "background" and you will see your newly created background texture there. Select it for use in your document and say "OK"


8. Insert more photos. Remember to "arrange" their layers, and print the document on 12x12 white matte card stock or photo paper if desired. LET DRY for at least two hours, longer if you use glossy--see product specifications.


9. Lightly rub the entire page with the Perfect Crafting Pouch.
This will eliminate static problems with the fine art glitter. This will happen more so if the entire page has been printed, the ink is moist. The extra drying time and the Perfect Crafting Pouch will eliminate this.


10. Apply The Best Glue Ever! over the printed initial.


11. Cover completely with glitter. I mixed blue and purple Tulip fine art glitter together to get the right color for the layout.


12. Dump off excess glitter and let dry.


I trimmed the approx 1/8 - 1/4" of white off the edges and mounted onto a piece of purple card stock that gives it a nice frame :o)

I hope you try this and have fun with it. If you have any questions, you can email me anytime or find BC Designs FaceBook.

Be sure to visit the ScraPefect Blog and Duetica Lettering Arts Blog for inspiration and project ideas.

Saturday, December 24, 2011

Surpise Mail: Thank You Duetica.com


In yesterday's package deliveries, I received this thoughtful and yummy "THANK YOU" from Mark and Adrienne DiCamillo, Owners of Duetica Lettering Arts Studio for being on the Duetica.com Design Team!


I will be enjoying this Harvest Medallion Tin with my family today.
You're very welcome, Mark and Adrienne, my pleasure.


MERRY CHRISTMAS TO ALL!

Cheers!
Becky

Tuesday, December 20, 2011

Robin's Nest: Convention Journal

Link
Welcome to my final Robin's Nest post for 2011! (more coming next year :o)

I'll be heading to California in Januray for the Winter Craft and Hobby Association (CHA) Show where I will be meeting and mingling. So, I created this Convention Journal to be my assistant in keeping all of my new contacts organized.

ROBIN'S NEST SUPPLIES:
Calamity Jane Stripe card stock
Glitter Pine Trees double sided card stock (back side is Just for Boys Stripe)
Brown Fish Net
Live Brightly rub on flourish
Country blue mesh fabric

Miscellaneous supplies:
3L clear pockets
fibers, plastic leaves,
shells, flat shell, mica,
art glitter
charms: sand dollar and moon w/ star
dolphin wall paper cut out
rubber snake, sea glass
5.5 x 8.5 chipboard (2)
RubiCoil binding machine and coil
balsa wood, dowel and acrylic paint to make buoys.
left over wood flourish (Kaiser Craft)
left over shell die cut (Spellbinders)

I adhered the Calamity Jane Stripe to the outside cover of the chip board and Glitter Pine Trees card stock to the inside covers with the Just for Boys Stripe side up. Then I punched them with the RubiCoil and decorated the front of the book as shown. I added glitter to areas where glue was showing (around net edges, wood flourish and among the shells)

There are 15 pages of printed card stock (both sides = 30) inside with a clear pocket on each to hold a business card from new contacts. 20 sheets of plain white paper and 20 sheets of lined paper. After the cover completely dried, I assembled with the coil binding.


HERE'S A GREAT TIP when binding: some how, my paper wasn't loaded correctly for this punch and the holes go off the page. OH NO, don't throw it away!


ANOTHER AWESOME use for Duck Tape!!
Cut a strip of duck tape approx 1", place half on the front side then fold over to the back side and re-punch!


VIOLA! GOOD AS NEW.


If you are going to a convention and need one of these journals, please contact me for a quote and details.

Thank you for stopping by today, please visit the Robin's Nest Blog: Chattering Robins for more inspiration and project ideas.

Sunday, December 18, 2011

WOOHOO! Another Term with Robin's Nest DT!


TODAY I GET TO SPILL THE GREAT NEWS! I was selected for another term on the Robin's Nest Design Team! Woohoo! Congratulations to the whole team, jump on over to the Robin's Nest Blog: Chattering Robins for their announcement and meet the entire team.

SHARING MY DT PROJECT AGAIN.

As promised! Here is my finished table setting for Christmas using lots of gorgeous
Robin's Nest papers.


I gave you a sneak peek last week of the place-mat.
Link
Robin's Nest Supplies:
PAPER!!!!! Red Snowflakes, Black and White Holly, Glitter Snow Covered Trees (I used the pseudo solids on the reverse sides), Glitter Silver on Creme Swirl.

Other supplies: fine art glitter, Cricut "Joys of the Season" Poinsettia and Holly, "Celebrations" confetti, stickles: crimson and gold, sewing machine w/ gold metallic thread, decorating chalks, red fine art glitter (tulip), Canson Drawing Paper 14x17", dark green card stock, Spellbinders Holly border die S5-056, white duck tape, Elmer's spray adhesive, iridescent art glitter.

Here is the angel. She's an altered doll! I made her top out of white duck tape, the wings are many small pieces of white cardstock rounded like feathers and glued in layers. Then I sprayed each wing with adhesive and covered with iridescent art glitter. Her waist band is made of Glitter Silver on Creme Swirl. embellished with a layered poinsettia like the ones on the napkin rings and place mats. The skirt is white paper with waves of glue and art glitter with a holly border.


NAPKIN RINGS: 1 1/5" strip of white card stock embellished with green Holly Border and a large poinsettia. (directions below)


PLACE CARDS: 8 1/2" x 5 1/2" white card stock folded with a layer of Red Snowflakes, and another layer of white with a large holly leaf and berries (directions below).


Directions:
1. The poinsettia is 5" (green card stock), 4" (Black and White Holly), 3" (Red Snowflakes), cut off the leaves of the 2 red layers, assemble and then outline the edges with glue and add fine art glitter. These were used on the place mats and napkin rings. The angel has a smaller identical set: 3 1/2, 2 1/2" and 1 1/2".

2. The holly is cut from Black and White Pine Tree paper (back side), make sure to cut one with the "FLIP" on so it's a mirror image. Make the berries red w/ stickles. These were used on the place mats and name cards.

3. I actually adhered the "confetti" (Black and White Holly) to the background, then stitched in gold, some straight stitch over the confetti and then zig zag around the border. Then attached the poinsettia and holly as shown.

Thanks for visiting BC Designs blog, please stop by the Robin's Nest Blog: Chattering Robins for lots of inspiration and project ideas!

Cheers!
Becky
Link

Friday, December 16, 2011

SAKURA: Artcover for Journal


Hello!! Welcome to my bi-weekly Sakura post. This week I created two embellishments to adorn my latest artfully covered composition book.

SAKURA SUPPLIES:
Oriental Paper (coming soon!)
3d Color Crystal Lacquer
3d Pearl Crystal Lacquer
Peacock Green Gem Particles

Other supplies:
Composition notebook
large postage stamp
Outline Sticker-Sparkraft Enterprises, Inc
Black & White Card stock
Cricut: Rock Princess cartridge
sheet of double-sided super sticky tape (Therm-o-Web)


The butterfly was cut from black cardstock at 3.5" in two layers and brushed with 3d Pearl Crystal Lacquer in blue and gold. While it was still wet, I rubbed the gold layer through the Gem Particles then let dry. Then I assembled the wings and added more details with 3d Colored Crystal Lacquer and 3d Pearl Crystal Lacquer. I added dimension to the body with black 3d Colored Crystal Lacquer.


I applied the sticker to white card stock, then colored in the open areas with 3d Color Crystal Lacquer and 3d Pearl Crystal Lacquer. When it was completely dry, I trimmed it to the size of the sticker.


I put a sheet of super sticky tape on the entire cover of the composition book to apply the decorative Japanese paper, roll with a brayer to get any air bubbles out and to assure good adherence and trimmed the edges. Merely embellish the cover with artful elements.

Thanks so much for stopping by the blog, please become a follower to receive updates and notices for new projects posted.

Be sure to stop by the Sakura Blog for more great project ideas.

Cheers!

Thursday, December 15, 2011

USArtQuest Design Team Application


Hello All, Welcome to my USArtQuest Design Team application.
I really had fun with this project and was able to use some USArtQuest products too.

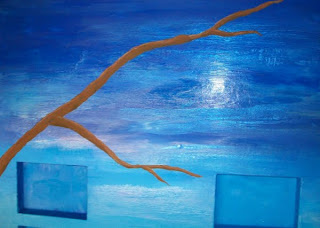
This board started out like this: it was one of those gambling / ticket boards at a local private club. There are 14 recessed rectangles that are 4.25x3".

I removed the clear laminate and the image down to the bare board and then I painted it with Artists' Gesso............ and just LOOK at all the help I had :o)

Patches and Tippy are 5 months old, they are SO curious.

I used acrylic paints and 2 blues from the Mica Watercolors by USArtQuest to paint the background. Then I painted some branches with two colors of brown acrylic paint.


The gold and red fonts were cut with Cricut cartridges: Plantin Schoolbook and Rock Princess 1 1/4".


"Love" was cut from a sheet of adhesive shell material that is made by USArtQuest, but I think it may no longer be available. I created a text document in word, then printed it in mirror image and adhered it to the back and cut it out with scissors and an blade cutter. The red heart that dots the "I"s came out of the "P" in the Rock Princess font, I liked it so much I cut another "P" so I could have another little heart for the other "I" :o)


I used a ruler as a guide to keep the letters aligned.


I printed the birds on regular paper, cut them out and decoupaged into place.
The top left rectangle is covered by a different color/style of the shell sheets made by USArtQuest. The rest of the depressions were filled with a large photo that I took in Barbados cut apart to fit the spaces. I added lots of miscellaneous left over embellishments, charms, the dolphin is a wall paper cut out, paper umbrella, metal sand dollar, shells, frog bead, tile squares, and there is a little monkey in the tree (second down on left). It is sealed with glossy clear coat.
There are three metal sentiments between the depressions on the left: "friends", "laughter" and "enjoy". I made holes and adhered them with glue and mini brads through the holes.

This collage could have been titled "My Favorite Things"! I just love the way it turned out; birds and the beach with lots of fun accents!

Thanks so much for stopping by the blog. Please be sure to visit USArtQuest.com and their blog: to learn more about their amazing products and watch some great "how to videos".

Make art everyday!
Becky