Welcome to the March Designer Crafts Connection Manufacturer Challenge and Give Away! This month, it's all about the buttons, with Buttons Galore & More. This month, we have many talented Designers sharing projects made with buttons and a fabulous prize package. The give away starts today and ends on March 17th. Leave a comment to enter. There will be a prize for one participating Designer and one Reader who comments. Drawings are random, so leave comments on all the blogs for more chances to win!
I had this BLAHzey black crocheted back that needed some perking up, but I wanted it to be a little quirky and still classy, a perfect fit for those Buttons Galore & More!
I had plans of adding stems with green rick rack, but after I completed one, it just ruined the "classy" so I removed it. This is an easy way to add a pop of color and whimsy to something just a bit too boring.
SUPPLIES: Fabric flowers, 3 lime green buttons by Buttons Galore & More, Black embroidery thread, 8 ply cotton, large hole needle, and your drab garment or bag.
Directions:
1. Use all 8 plies of the thread.
2. Remove the center of fabric flowers, use two layers of flowers behind each button.
3. Sew the button and flowers to the garment using a cris-cross only once, tie off on the inside of the bag.
4. Be mindful of placement and adjust as necessary when sewing.
Use the DCC hop button on my side bar to see many more fabulous button projects!
If you have the time, stop by and see the Buttons Galore & More NEW RELEASES
Follow them on FaceBook for projects and give aways!
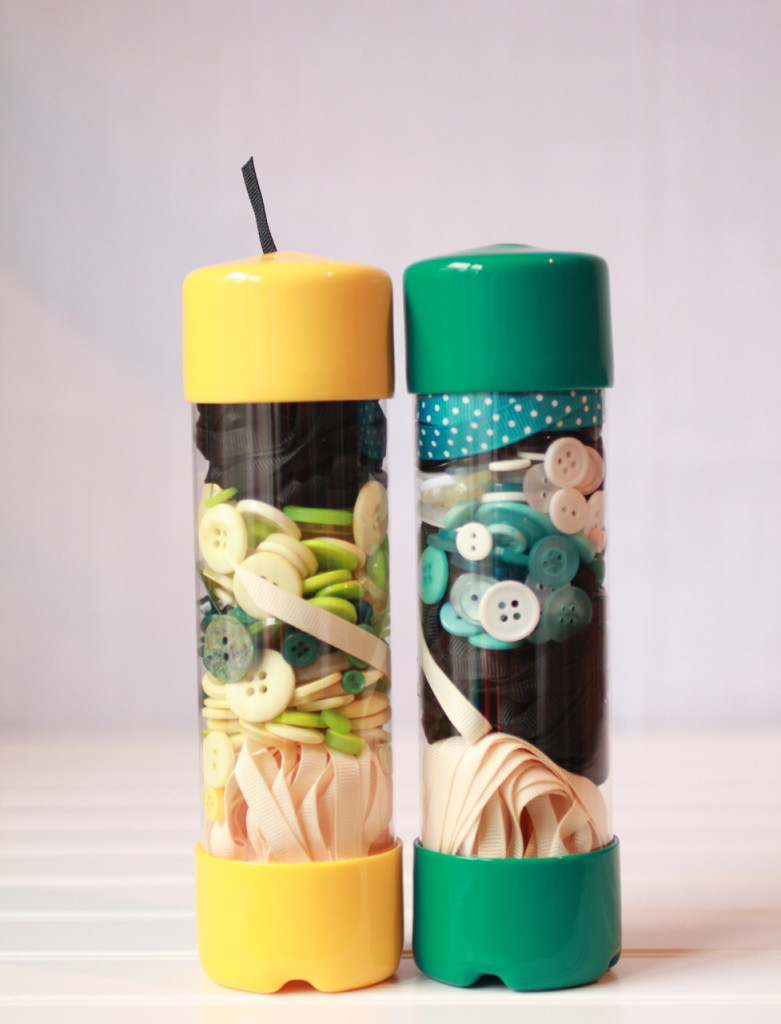
Viewtainer has donated the containers for the contest winners
VIEWTAINER containers have clear walls, come in fun bright colors with
an easy dispensing cap and NO spilling! Proudly made in the USA!
Company Overview
General Information
For more information contact us at:
Email: contactus@viewtainer.com
Phone: 1/888-865-9935
Website: www.viewtainer.com
Blog: http://viewtainer.typepad.com/blog/
Facebook: http://www.facebook.com/Viewtainer
Twitter: @Viewtainer
Showing posts with label give away. Show all posts
Saturday, March 9, 2013
Monday, April 2, 2012
Designer Crafts Connection Blog Hop
Welcome to this month's Designer Crafts Connection Blog Hop! DCC is a large, diverse and very talented group of artists and designers. We "hop" on the first Monday of each month--many have give a ways and blog candy that will be drawn later in the month. ENJOY all of the "April Inspiration" this month, visit all the bloggers by using the HOP button on my side bar or at the end of this post.
**I will be drawing one winner on April 16th for a $25 gift card to Starbucks!! Please comment by COB Sunday, April 15th.
My inspiration for this flower was a DIY for large tissue paper flowers found at designsponge.com and created by Kate Pruitt found here: TISSUE PAPER DIY
It was created in the "spirit" of Van Gogh's "Starry Night" for a Charitable Art Show I am donating it to and it will be up for auction at the Town Club event in Sanford, ME on April 26th, 5:30-7:30pm to benefit Counseling Services Inc. (another art piece below I created also for this event - Starry Night Abstract)

Approximately 6 feet tall

1. There are three 3/4" x 8"square boards screwed together for the base with a plastic plant pot screwed to that.
2. I filled the plant pot with cement and inserted three wooden (bamboo?) branches.
3. After it is completely dry, spray with 3 coats of stone fleck spray paint.

4. Form a leaf shape with a wire hanger using the "hook" part as a stem to attach to the flower stem, Cut fabric to shape 1/2" to 3/4" larger all the way around for the seam. Sew the fabric with wrong sides out. Do not sew completely, leave the opening large enough to insert the wire hanger form and then hand sew to meet with the "stem".
*This fabric is vintage brocade I purchased at a thrift store!! GORGEOUS.
5. Attach the coat hanger "stem" of the leaf to the bamboo base for flower stem securely with wire.

6. Cut 4" strips of fabric, wrap around the bamboo base adhering securely with hot glue.
Don't just "spot" with hot glue, bunching will occur (voice of experience there LOL). If you need to pinch to make the stem more narrow throughout this process, just wrap the next layer high enough to cover the puckers.
7. The stem is wrapped with a gorgeous assortment of 1/2" to 3/4" GLASS BEADS! It's so pretty! The are on heavy wire, secured at the top of the stem and at the bottom.

8. The center of the flower is a plastic frame that was a gaudy Easter egg covered with teal and white garland from the dollar store. I removed the garland and attached the frame to the top of the stem with wire.
9. In the spirit of "Starry Night", this sculpture is lighted! I used a battery operated set of 50 white lights attached to the "egg" base with wire twists. I tried just wrapping it but had much better results by securing each light individually where I wanted it and pointing it's direction to the front.

**There is 20 yards of navy blue tulle here :o)
10. Using 2-3 yards of tulle, I pushed "puffs" through the back of the center form to the front and pulled them fluffy and full to cover the form and hide the lights.
11. Accordion fold layers from the rest of the tulle approx 3/4" yard (yes, this was a 2 person job! Thank you, honey!), then cut a basic flower shape through all of the layers. Randomly stagger a few sections of the stack just so all the petals weren't lined up exactly.
12. Using a large needle and fishing line or clear beading fibers, gather the center and attach to the back side of flower center. This took some more strategic gathering and sewing in multiple places.
13. Fluff the layers of tulle thoroughly and individually to achieve fullness in the bloom.
It's really breath-taking in person! I hope you'll stop by the Town Club on April 26th to view it, along with my other donated piece: Starry Night Abstract.

Layers of canvas over a black branch frame, mixed media with metallic pigments.
Approximately 4 feet by 5 feet.
Thank you for hopping with the DCC! Use the HOP button to visit all the blogs and leave a comment here to win $25 GC for Starbucks on April 16th.
Cheers!
Becky
**I will be drawing one winner on April 16th for a $25 gift card to Starbucks!! Please comment by COB Sunday, April 15th.
My inspiration for this flower was a DIY for large tissue paper flowers found at designsponge.com and created by Kate Pruitt found here: TISSUE PAPER DIY
It was created in the "spirit" of Van Gogh's "Starry Night" for a Charitable Art Show I am donating it to and it will be up for auction at the Town Club event in Sanford, ME on April 26th, 5:30-7:30pm to benefit Counseling Services Inc. (another art piece below I created also for this event - Starry Night Abstract)

Approximately 6 feet tall

1. There are three 3/4" x 8"square boards screwed together for the base with a plastic plant pot screwed to that.
2. I filled the plant pot with cement and inserted three wooden (bamboo?) branches.
3. After it is completely dry, spray with 3 coats of stone fleck spray paint.

4. Form a leaf shape with a wire hanger using the "hook" part as a stem to attach to the flower stem, Cut fabric to shape 1/2" to 3/4" larger all the way around for the seam. Sew the fabric with wrong sides out. Do not sew completely, leave the opening large enough to insert the wire hanger form and then hand sew to meet with the "stem".
*This fabric is vintage brocade I purchased at a thrift store!! GORGEOUS.
5. Attach the coat hanger "stem" of the leaf to the bamboo base for flower stem securely with wire.

6. Cut 4" strips of fabric, wrap around the bamboo base adhering securely with hot glue.
Don't just "spot" with hot glue, bunching will occur (voice of experience there LOL). If you need to pinch to make the stem more narrow throughout this process, just wrap the next layer high enough to cover the puckers.
7. The stem is wrapped with a gorgeous assortment of 1/2" to 3/4" GLASS BEADS! It's so pretty! The are on heavy wire, secured at the top of the stem and at the bottom.

8. The center of the flower is a plastic frame that was a gaudy Easter egg covered with teal and white garland from the dollar store. I removed the garland and attached the frame to the top of the stem with wire.
9. In the spirit of "Starry Night", this sculpture is lighted! I used a battery operated set of 50 white lights attached to the "egg" base with wire twists. I tried just wrapping it but had much better results by securing each light individually where I wanted it and pointing it's direction to the front.

**There is 20 yards of navy blue tulle here :o)
10. Using 2-3 yards of tulle, I pushed "puffs" through the back of the center form to the front and pulled them fluffy and full to cover the form and hide the lights.
11. Accordion fold layers from the rest of the tulle approx 3/4" yard (yes, this was a 2 person job! Thank you, honey!), then cut a basic flower shape through all of the layers. Randomly stagger a few sections of the stack just so all the petals weren't lined up exactly.
12. Using a large needle and fishing line or clear beading fibers, gather the center and attach to the back side of flower center. This took some more strategic gathering and sewing in multiple places.
13. Fluff the layers of tulle thoroughly and individually to achieve fullness in the bloom.
It's really breath-taking in person! I hope you'll stop by the Town Club on April 26th to view it, along with my other donated piece: Starry Night Abstract.

Layers of canvas over a black branch frame, mixed media with metallic pigments.
Approximately 4 feet by 5 feet.
Thank you for hopping with the DCC! Use the HOP button to visit all the blogs and leave a comment here to win $25 GC for Starbucks on April 16th.
Cheers!
Becky
Monday, August 8, 2011
Designer Crafts Connection GIVEAWAY
The Designer Crafts Connection Blog Group is having a giveaway!

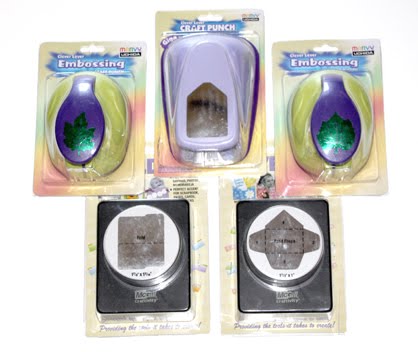
WIN THESE PUNCHES!
I am a total punch addict, so I know this prize has to be worth approx $70
ALL YOU HAVE TO DO is use the Designer Crafts "HOP" button on my side bar to visit all of the participating blogs, then go to Julie McGuffee's Blog to leave a comment with the following:
which technique they liked the best,
which one they are going to try and
which one was the most unique.
The winner will be announced on August 15th.
HAVE FUN and enjoy all of the inspiration you'll discover through the bloggers in this hop!

WIN THESE PUNCHES!
I am a total punch addict, so I know this prize has to be worth approx $70
ALL YOU HAVE TO DO is use the Designer Crafts "HOP" button on my side bar to visit all of the participating blogs, then go to Julie McGuffee's Blog to leave a comment with the following:
which technique they liked the best,
which one they are going to try and
which one was the most unique.
The winner will be announced on August 15th.
HAVE FUN and enjoy all of the inspiration you'll discover through the bloggers in this hop!
Subscribe to:
Posts (Atom)