Showing posts with label journal. Show all posts

Monday, January 14, 2019

Journal Covers made EASY! Win a book kit!

Arnold Grummer makes creating pretty journal covers a breeze!

Hop over to see the instructions, but leave a comment here for a chance to win an Arnold Grummer's "Make your own Book" kit!

Craft on!
Becky

Friday, December 21, 2012

Altered Arts Magazine: Journal Cover

This journal cover was made for Altered Arts Magazine with some very yummy preferred partner products!


Journal Cover

Supplies:
5 3/4” x 8” chipboard journal with blank white pages, Kunst & Papier
12x12” decorative paper; Old Curiosity Shoppe Collection, Graphic 45
Flute” paper, Canvas Home Basics
Ribbon; Urban Couture, Basic Grey
Dye ink, Red Pepper-Adirondack Earthtones, Ranger Ink
Distress Ink, Black Soot-Tim Holtz, Ranger Ink
Leather flower embellishments, So Happy, Prima
Bling Flourish, “Say it with bling”, Want 2 Scrap
Bird Cut out, “Wings and Things”(Cyndi Duncan), Mail Box Muse
Double Sided Super Sticky Tape, ThermOWeb

Instructions:
  1. Cut 2 pieces of decorative paper to the size of the journal covers. Adhere one to the front and one to the back. Ink the edges.
  2. Cut Flute paper triangle 5” x 2 1/2” and a rectangle 3 1/4” x 4”.
  3. Gently fold the rectangle but do not crease and hand cut a heart shape from the bottom center as the bird house “door”.
  4. Apply red ink to the triangle roof piece and black ink to the rectangle piece.
  5. Attach a piece of ribbon around the rectangle using double sided sticky tape.
  6. Attach the “birdhouse” pieces to the journal cover.
  7. Cut out the bird image.
  8. Glue the flower embellishment into place and slip the bird slightly behind the flower.
  9. Attach the bling flourishes. 


Thanks so much for stopping by the blog today.
Merry Christmas to all!
Make art everyday!
Becky

Tuesday, December 20, 2011

Robin's Nest: Convention Journal

Link
Welcome to my final Robin's Nest post for 2011! (more coming next year :o)

I'll be heading to California in Januray for the Winter Craft and Hobby Association (CHA) Show where I will be meeting and mingling. So, I created this Convention Journal to be my assistant in keeping all of my new contacts organized.

ROBIN'S NEST SUPPLIES:
Calamity Jane Stripe card stock
Glitter Pine Trees double sided card stock (back side is Just for Boys Stripe)
Brown Fish Net
Live Brightly rub on flourish
Country blue mesh fabric

Miscellaneous supplies:
3L clear pockets
fibers, plastic leaves,
shells, flat shell, mica,
art glitter
charms: sand dollar and moon w/ star
dolphin wall paper cut out
rubber snake, sea glass
5.5 x 8.5 chipboard (2)
RubiCoil binding machine and coil
balsa wood, dowel and acrylic paint to make buoys.
left over wood flourish (Kaiser Craft)
left over shell die cut (Spellbinders)

I adhered the Calamity Jane Stripe to the outside cover of the chip board and Glitter Pine Trees card stock to the inside covers with the Just for Boys Stripe side up. Then I punched them with the RubiCoil and decorated the front of the book as shown. I added glitter to areas where glue was showing (around net edges, wood flourish and among the shells)

There are 15 pages of printed card stock (both sides = 30) inside with a clear pocket on each to hold a business card from new contacts. 20 sheets of plain white paper and 20 sheets of lined paper. After the cover completely dried, I assembled with the coil binding.


HERE'S A GREAT TIP when binding: some how, my paper wasn't loaded correctly for this punch and the holes go off the page. OH NO, don't throw it away!


ANOTHER AWESOME use for Duck Tape!!
Cut a strip of duck tape approx 1", place half on the front side then fold over to the back side and re-punch!


VIOLA! GOOD AS NEW.


If you are going to a convention and need one of these journals, please contact me for a quote and details.

Thank you for stopping by today, please visit the Robin's Nest Blog: Chattering Robins for more inspiration and project ideas.

Friday, December 16, 2011

SAKURA: Artcover for Journal


Hello!! Welcome to my bi-weekly Sakura post. This week I created two embellishments to adorn my latest artfully covered composition book.

SAKURA SUPPLIES:
Oriental Paper (coming soon!)
3d Color Crystal Lacquer
3d Pearl Crystal Lacquer
Peacock Green Gem Particles

Other supplies:
Composition notebook
large postage stamp
Outline Sticker-Sparkraft Enterprises, Inc
Black & White Card stock
Cricut: Rock Princess cartridge
sheet of double-sided super sticky tape (Therm-o-Web)


The butterfly was cut from black cardstock at 3.5" in two layers and brushed with 3d Pearl Crystal Lacquer in blue and gold. While it was still wet, I rubbed the gold layer through the Gem Particles then let dry. Then I assembled the wings and added more details with 3d Colored Crystal Lacquer and 3d Pearl Crystal Lacquer. I added dimension to the body with black 3d Colored Crystal Lacquer.


I applied the sticker to white card stock, then colored in the open areas with 3d Color Crystal Lacquer and 3d Pearl Crystal Lacquer. When it was completely dry, I trimmed it to the size of the sticker.


I put a sheet of super sticky tape on the entire cover of the composition book to apply the decorative Japanese paper, roll with a brayer to get any air bubbles out and to assure good adherence and trimmed the edges. Merely embellish the cover with artful elements.

Thanks so much for stopping by the blog, please become a follower to receive updates and notices for new projects posted.

Be sure to stop by the Sakura Blog for more great project ideas.

Cheers!

Thursday, October 20, 2011

CLEARSNAP: Artful Journal


Hello everyone! I'm very excited to be posting as a Guest Designer this month for Clearsnap!
I got a little inky creating this journal, I hope you enjoy it.

Clearsnap Supplies:
Colorbox Archival Pigment and Pearl ink Cat's Eye: Plum Berry, Violet, Heliotrope, Deep Grape, Dark Cherry
Holographic Stars Designer Foil
Glue Gloss

Other Supplies:
Textured wall paper, pre-bound journal, Purple acrylic paint, glass beads, wire, 2x3 stampbord, Star rubber stamp by Rubberstamp Romance, Gold embossing powder, heat tool, indigo walnut ink, Raspberry alcohol ink, dremel tool, scrap ribbon, Double sided super tape sheet, clear pigment pad, gold embossing powder, metal watch face.

HOW TO:

First, disassemble the journal to remove the front and back cover so you can decorate them.
Trim the wall paper to size just slightly larger than the book cover.

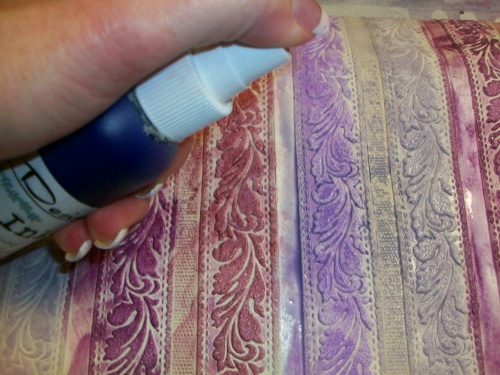
Add stripes of color to the textured wall paper by applying the pad directly to the paper. Cover the entire piece of paper.

Spritz with indigo tinted walnut ink. I made this spritz myself by boiling walnut ink powder and adding a bit of Rit indigo dye.

This step moves the ink around and lets it sink into the low spots.


Dab gently with a paper towel to remove puddles, let dry completely.

Once dry, use the ink pads again to lightly add a different color to high spots.
Heat set. Cover the book covers with the colored wall paper, double sided super tape sheets work best for this step, trim as necessary.

Paint the edges with acrylic paint, dry brush a little paint on to the wall paper.
Add more color with Colorbox Archival Ink Cat's Eyes, heat set. Coat the edges with Glue Gloss to seal the paint.


Pounce the background of the stampbord with Heliotrope Colorbox Archival Cat's Eye, then shade the edges with Violet Colorbox Archival Cat's Eye. Heat set.

Stamp the sun image onto the stampbord, and emboss with gold embossing powder. Color the watch face with alcohol ink, let dry and attach to the center of the sun image. Hand cut a small circle of Super Double-Sided sticky tape and attach to the center of the watch face, apply Designer Foil.

Twist wire around a bead and create a hanging ornament. Use a dremel tool or small drill to drill a hole through the stampbord in the lower left corner, attach the beaded wire to the stampbord either with wire or a scrap of ribbon. Glue the finished embellishment to the front of the journal.

Reassemble the finished journal, by reattaching the binding and pages.

Thanks so much for stopping by the blog! Become a follower, there's new inspiration and ideas with every post. Check out the Clearsnap Blog for more ideas!

Cheers!
Becky Conley